Figurenotes is perfectly suited to the piano. By placing stickers on the white notes, we make it much easier to see the repeating pattern of notes that the piano has. Each note has a colour and each octave has a shape. You can see the relationship between notes, while still seeing them as different. Match the note on the page to the sticker on your instrument and you are playing!
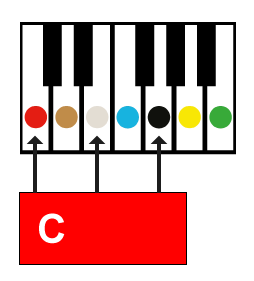
Middle C is the red circle in the diagram below. Make sure you get the correct order of colours and shapes when placing your stickers on the keys. If you are unable to put stickers on the keys, which we recommend you do, you can get ‘Figurenotes Fingers’ from the Resource Base. Print and laminate, then place over the keys to create a removable guide.
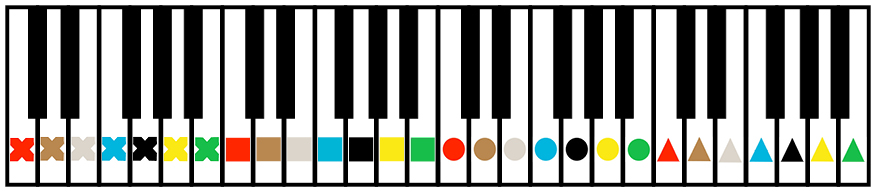
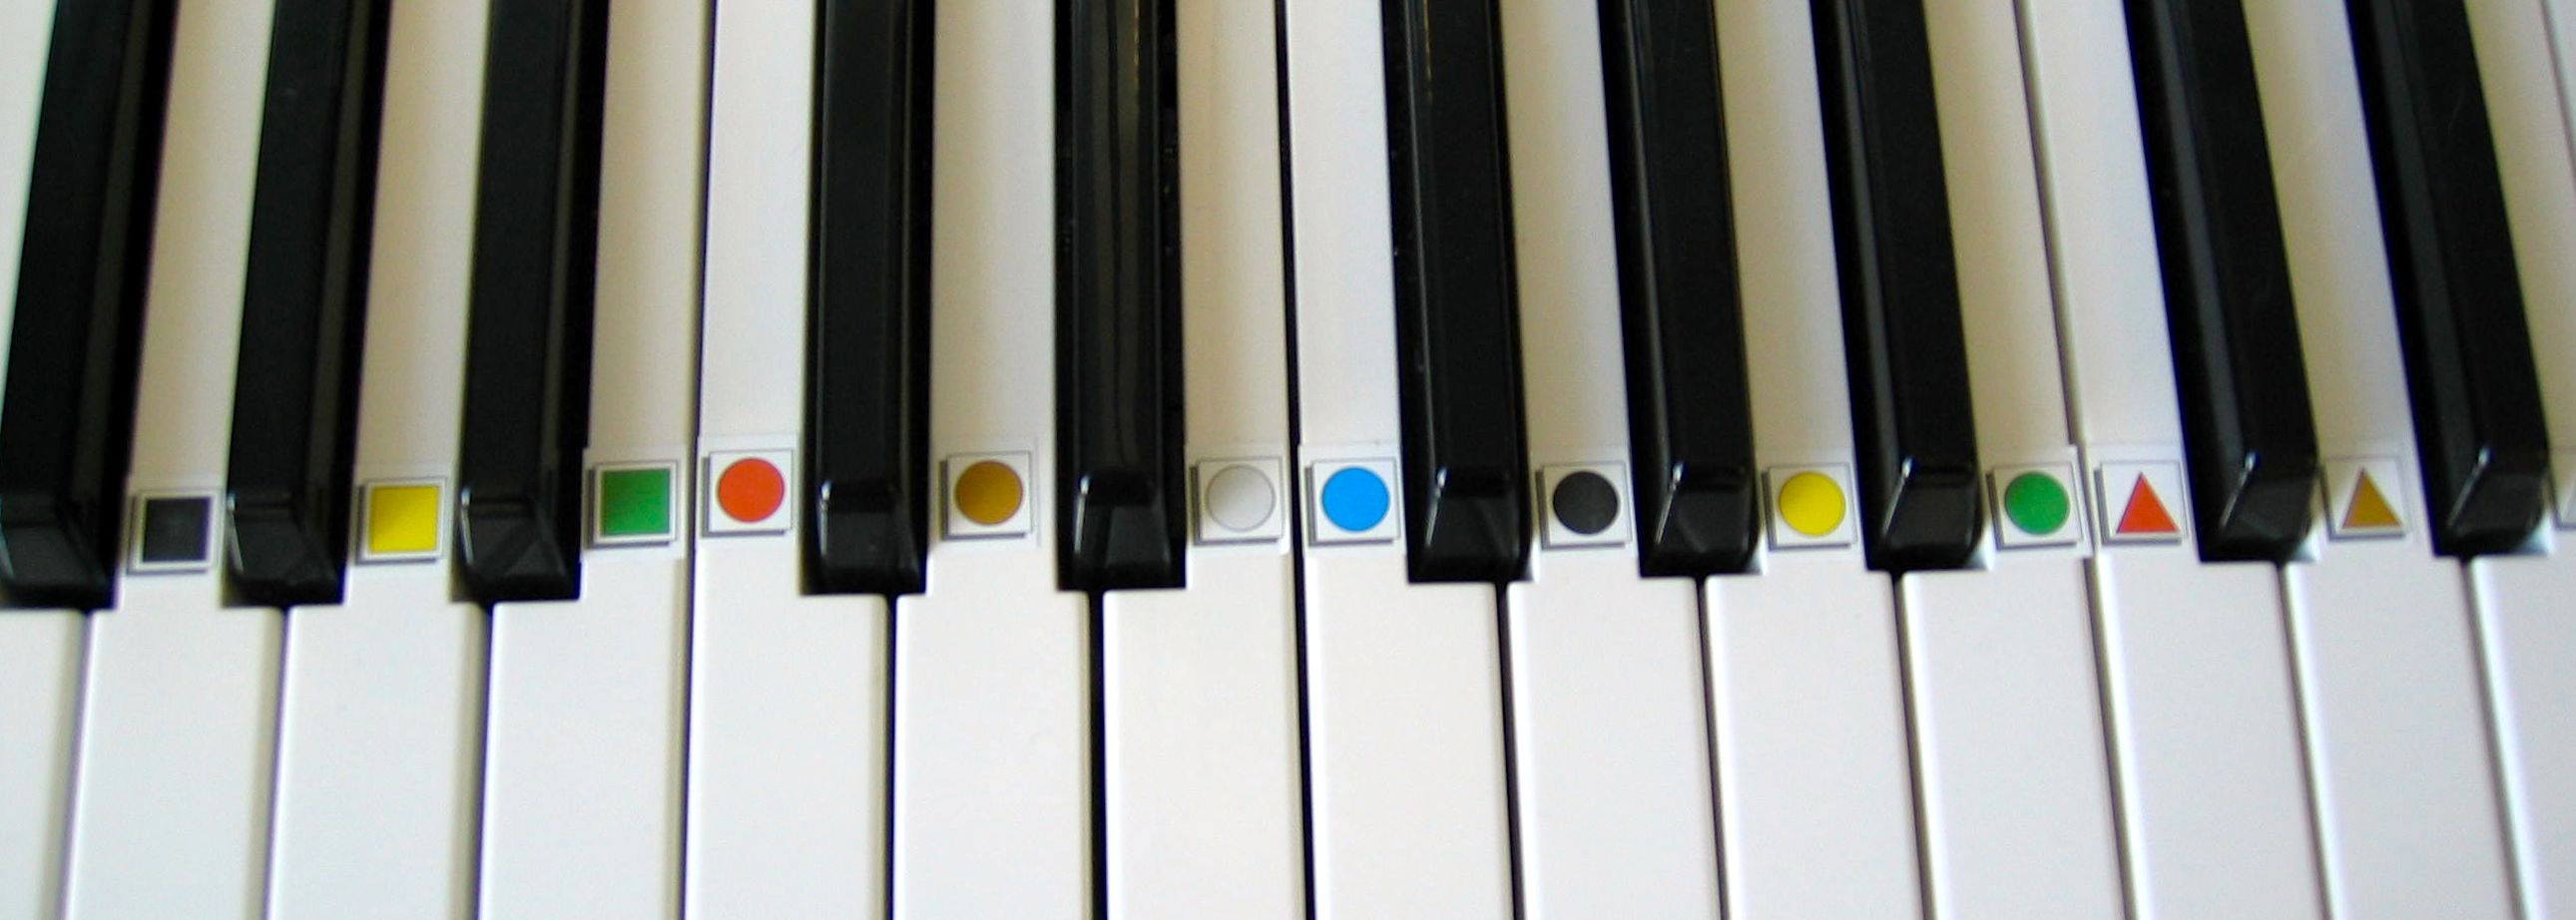
We would recommend placing the stickers in line with the tip of the black keys (see photo below). This means that the player can still see the stickers when their hands are in position. The last thing we want to do is get in the way of technique.
Sharps and flats are easily explained by moving your hand in the direction of the arrow. This can also help with learning the relationship between higher sounds moving to the right, and lower sounds to the left. This spacial learning, coupled with notation-reading skills, can really help in other areas of a pupil’s development. You can find out more about this element of Figurenotes in the ‘What is Figurenotes?’ section of the website.
One of the elements of playing the piano well is harmony and chordal playing. We can use Figurenotes to build this skill using small, simple steps. In order to play a chord, we start by playing the colour of the chord box. We then find a friend, not a neighbour. To finish the triad, we play another friend, not a neighbour. This creates your triad.
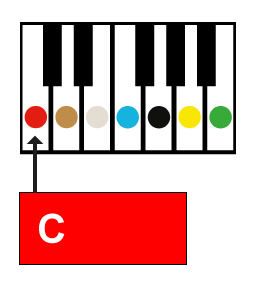

In order to start building this skill, we begin by playing just the root (the colour of the chord box) as a single note. When we can play two hands in this way, it will be time to move to two-note chords. Try playing the root note and a friend (the third). If you’re comfortable playing two hands with these chords, why not move to the full triad. Between learning each step of the chords, you could try playing along to someone else’s melody, rather than diving straight in with two hands.
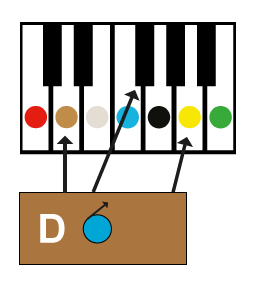
Develop even further by using chords with sharps or flats within the triad. You can see in the image below that there is a blue note with an arrow inside the box. This means that if we come across a blue (F), we need to adjust it by moving to the note to the right of it (F#). We recommend using simple chords, as many people will have progressed beyond Figurenotes stage 3, onto standard notation, by the time more complicated chords are required in their pieces.
The Figurenotes Software allows you to notate chord parts and melody parts for either hand, so whether you have a beautiful bass line or some thumping chords, reading the notation won’t be an issue. Get your copy today and start creating resources tailored to your pupils’ needs.